
First ...
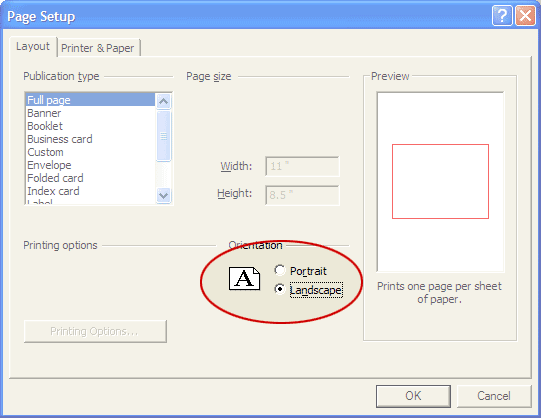
... First open Publisher and create a new blank file. Go to File - Page Setup and click on the landscape option, click ok. Like shown in Screen Shot 1.

Second ...
... Create a text box (about 2.6 inches in width).

Third ...
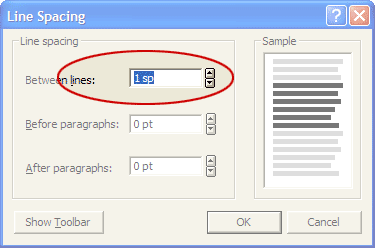
... Add lines by holding down the shift + Dash/Underscore key. To customize your line spacing: Select lines, go to Format - Line spacing... I used 1.25 as shown in Screen Shot 2.

Fourth ...
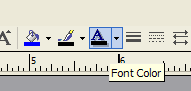
... With the lines still selected. Choose a font color. I used grey but feel free to pick whatever color you want. Like shown in Screen Shot 3.

Fifth ...
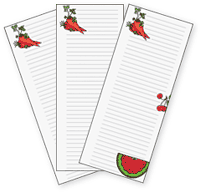
... Now choose 2 or 3 clip art images from Graphics Factory and Add them to your download cart in a .WMF or .EPS format (View the fastest way to download clip art tutorial). I prefer to use .WMF or .JPG images for this project as they are easier to use because you can copy and paste them directly onto your shopping list.

Sixth ...
... After you resize and position your clip art images you can print and cut your shopping list. You can also make some for friends.
